
Sitecore SXA (Sitecore Experience Accelerator) is a powerful tool that enables developers and marketers to build and manage multilingual websites efficiently within the Sitecore Experience Platform. SXA provides built-in features and components that facilitate the creation of multilingual websites, allowing you to deliver content in multiple languages.
To configure bilingual languages in Sitecore SXA, you need to follow these steps:
Step: 1 Enable Bilingual Languages:
In Sitecore, you need to enable the languages you want to use. Go to the “Content Editor” application, navigate to the “System” folder, and find the “Languages” item. Ensure that the desired languages are enabled.

Right-click the Languages node found under /sitecore/system and insert a Language item.
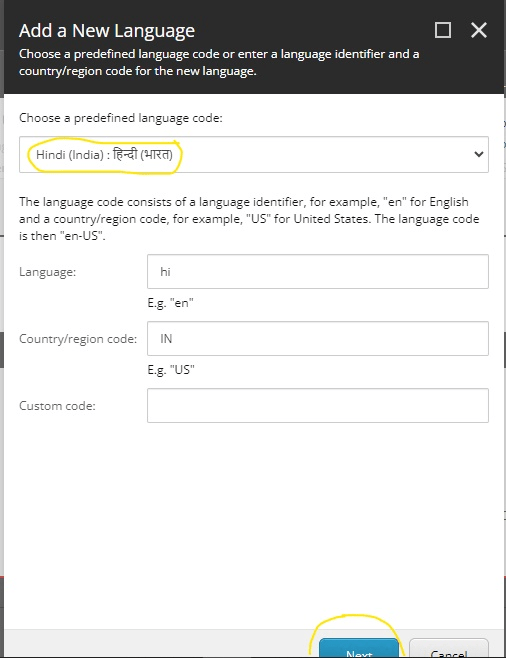
select the language you want to support using the dropdown at the top. After making a selection there, the fields below the dropdown will auto-populate.

Step: 2 Add the new language to the SXA site :
To add a new language to your SXA site, simply right-click the SXA site and go to the Scripts and select “Add Site Language option.
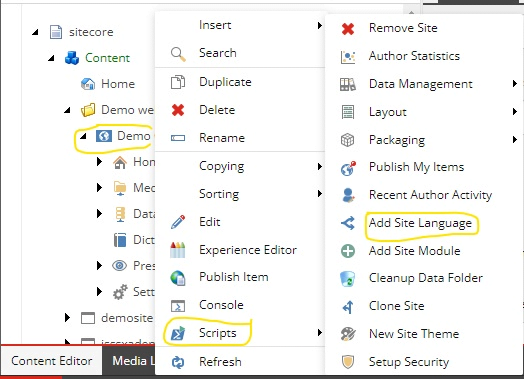
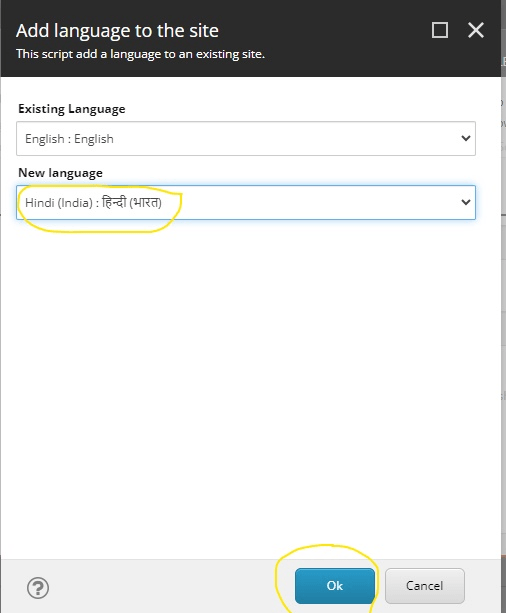
Select the new language which have already added and “ok”
Step: 3-Configure language versions:
After adding the language to the site, you need to configure the language versions for each item in the SXA site. This step allows you to define which items should have language versions and specify fallback languages if needed. Follow these steps to configure language versions:
a. In the Sitecore Content Editor, navigate to the site root item.
b. Expand the site node and locate the “Presentation” item.
c. Under the “Presentation” item, find the “Language Versions” item and open it.
d. In the “Language Versions” dialog, select the language you added in step 2.
e. Choose the desired language versions for each item and click “OK” to save the changes.
f. Save and publish the changes to apply the language versions to the site.

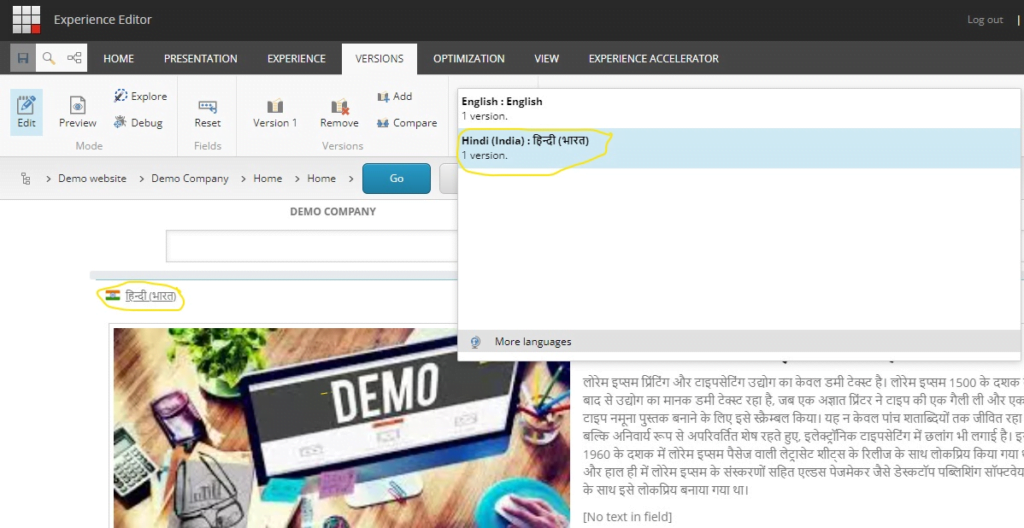
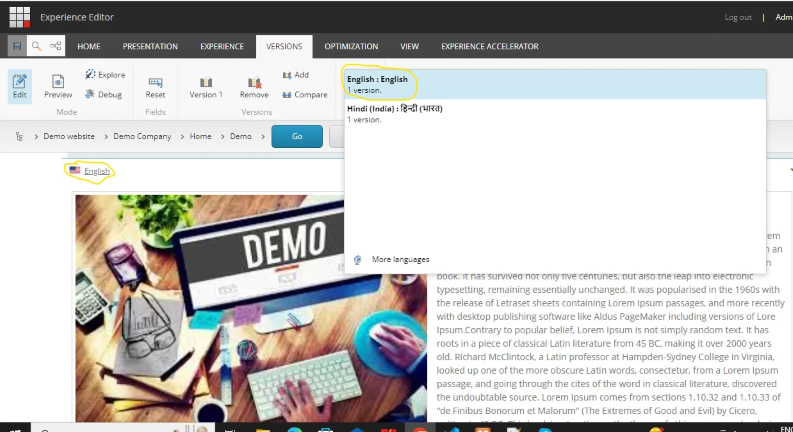
Step: 4-To set up a language selector:
a. Go to “Content Editor” ,select sxa site and expand it.
b. Go to the page where you want to display the language selector.
c. Switch to the “Experience Editor” mode.
d. Navigate to the location where you want to place the language selector and open the “Components” toolbox.
e. Drag and drop the partial design containing the language selector onto the page.
f. Save and publish the changes.
Once these steps are completed, the language selector should be visible on your site.
Step 5: Create language versions of content:
Navigate to the content item you want to make bilingual. In the “Versions” tab, create a new version for each language you want to support. Switch to each language version and enter the translated content.
Visitors will be able to select different languages from the selector, and the content will be displayed in the chosen language.