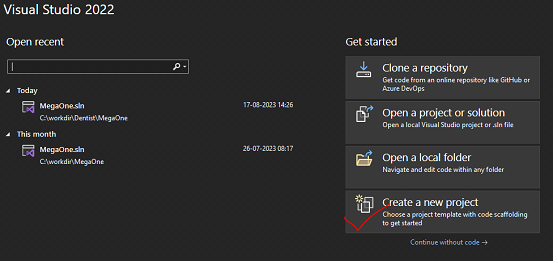
1. Open visual studio. Create a new project, select Template(MVC .net framework). Name your project as MegaOne (You can name it as required). Choose latest frame work.
2. Select View options and choose Solution Explorer. You can see the solution explorer opened right side in the page with your project name.
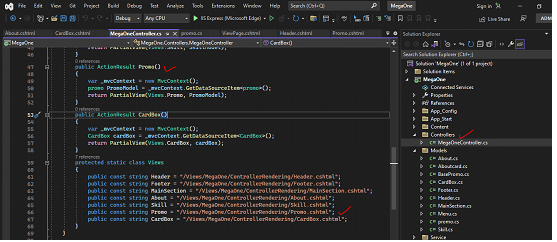
3. Create a folder by right clicking in your project. Add a controller in this folder. Then add a class and name it MegaOne. In this class we make different control action methods. And below the action method we also add views for the same.
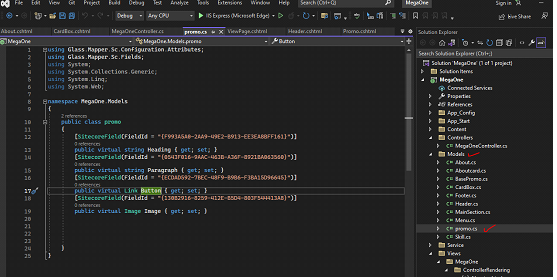
4. Create a Model folder. Add a class on this model folder and name it promo. Make fields as requied in your promo component such as Heading, Paragraph, Button and Image. You must provide the Field Id of each component. You can find this id from sitecore template where you have created the promo template in template section.
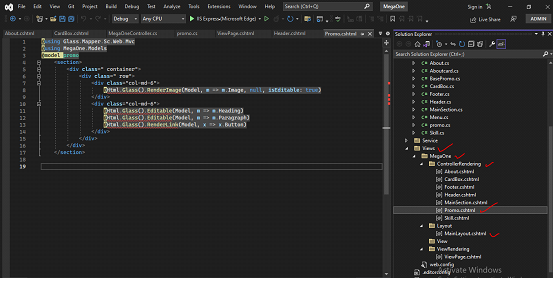
5. Create a View Folder. Add anotehr MegaOne folder inside it. Add one more folder as Control Rendering inside it. Now add new item and select rajor file, add class and name it promo. Open promo.cshtml file and add required namespace. We can render each field here. Add another layout folder and add main layout cshtml file inside it.
NOW COME IN SITECORE
Follow the below steps:
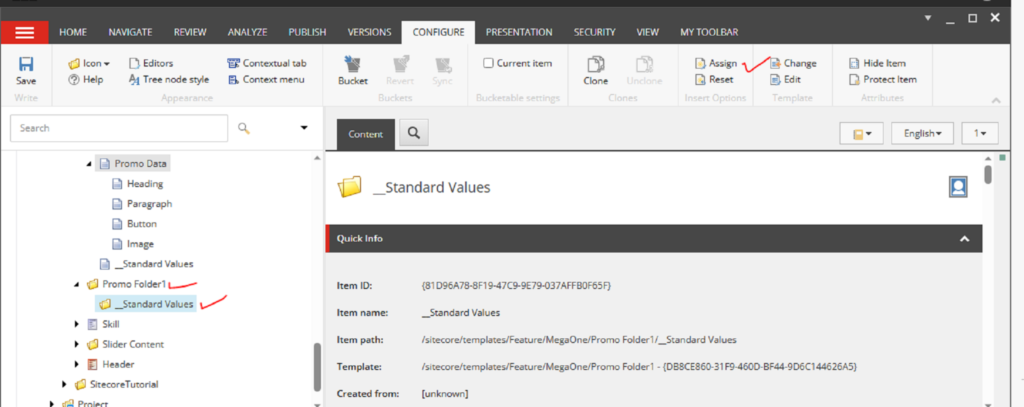
Log in your sitecore. Select Template in content tree and inside feature folder make another folder. This folder name should be your project name. Here insert a new Template and name it promo, also set it’s standard value. Now inside Promo template again insert a new Template and make a section and name it Promo Data. Below this section we can add different field. In our case we have field like Heading as single line text, Paragraph as rich text, Image as image, and button as a general link.
2. Make a new Template(Promo Folder). Set it’s standard value. Click in it’s standard value and assign the promo Template. Here we can change the Template icon as our choice.
3. Now come in Your website(in our case it is MegaOne). Expand it and choose Data. Here by right clicking on data folder and choosing insert option we can see the Promo Folder which has been already made in Template section. So, choose Promo Folder here. Inside this Promo Folder again choose the promo Template by right clicking.
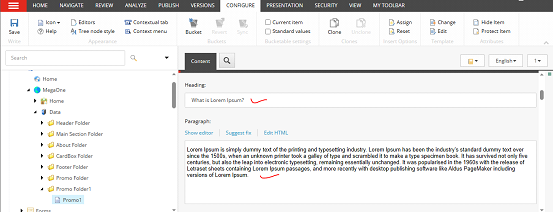
4. Insert the required data in relevent fields inside the promo Template. We have fields here Heading, Paragraph, Image and button.
NOTE:
Before inserting an image in image field we upload image in media library first. For this you can go in media library section. Make a folder and name it as your project name. Here upload your image. If you get any error then put it’s alt tag name.
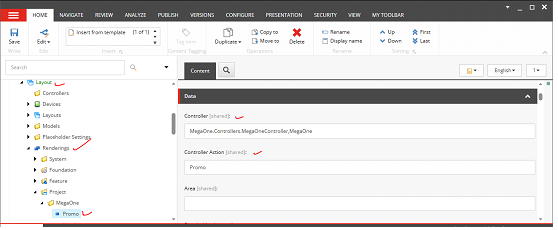
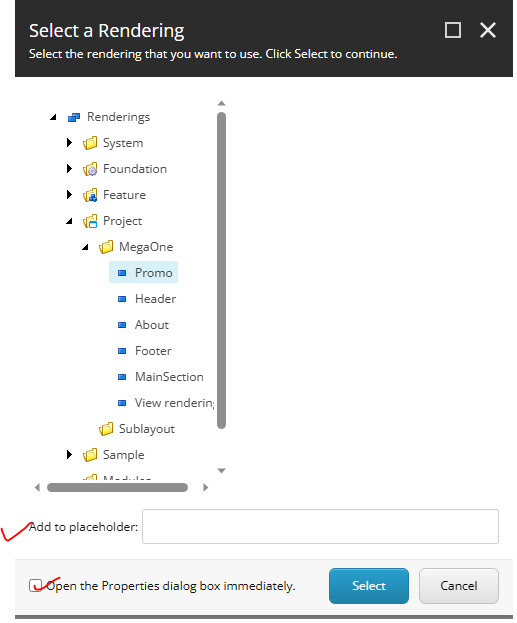
5. Select Layout option in Sitecore content tree. Go inside project option by right click and choose control rendering. Here you can see many rendering like view rendering, control rendering, and many other renderings. In our case we choose control rendering and name it promo.
NOTE:
You must specify the Controller name and it’s Controller Action name.
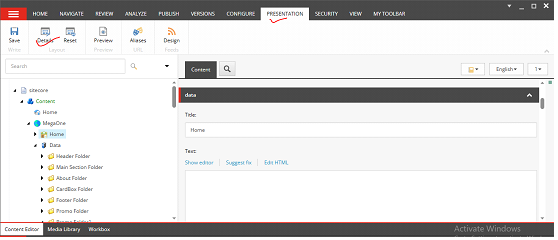
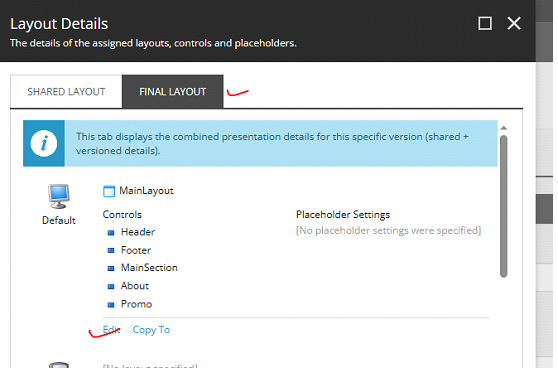
6. Select Home inside content tree. Go to ribbon section and select presentation, then details. Here you can select final layout. Further you can see edit option below it. Select edit option. Choose control then add control rendering(promo), then give a place holder name(Main Section). Then tick the check box which allow us to browse the data source. Click ok button. Here we browse the data source.
NOTE:
Don’t forget to hit save button after completing each steps.
7. Build your project then publish it.
8. Open IIS and select your website then run your project by choosing Browse option.
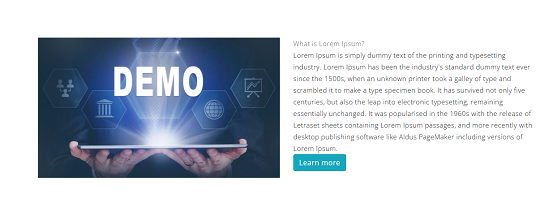
We can see the final output below after running our project.
We use cookies to personalize content and ads, to provide social media features and to analyze our traffic. We also share information about your use of our site with our social media, advertising and analytics partners who may combine it with other information that you have provided to them or that they have collected from your use of their services. You consent to our cookies if you continue to use our website.
We use cookies to personalize content and ads, to provide social media features and to analyze our traffic. We also share information about your use of our site with our social media, advertising and analytics partners who may combine it with other information that you have provided to them or that they have collected from your use of their services. You consent to our cookies if you continue to use our website.
Necessary cookies help make a website usable by enabling basic functions like page navigation and access to secure areas of the website. The website cannot function properly without these cookies.
Preference cookies enable a website to remember information that changes the way the website behaves or looks, like your preferred language or the region that you are in.
Statistic cookies help website owners to understand how visitors interact with websites by collecting and reporting information anonymously.
Marketing cookies are used to track visitors across websites. The intention is to display ads that are relevant and engaging for the individual user and thereby more valuable for publishers and third-party advertisers.
Unclassified cookies are cookies that we are in the process of classifying, together with the providers of individual cookies.