

Sitecore CMS stands for content management system. It is a powerful tool for brands that create, manage, and optimize the digital experience of customer. Content management system is also referred as web content management system(WCM). A CMS is a software application that enables user to create, edit and production of digital content such as e-mail, social media, mobile app, web pages, and blog pages within any organization.
By using this tool one can write the content, modify it and also format it. Here user is completely able to do the backstage work like SEO. In short we can say that content management system is a tool that enables author to create, manage, and publish the content.
Different types of content management system
* Digital asset management system(DAM)
DAM is a software system that helps organization to store, organized, and distribute digital content like documents, videos, graphics and photos etc.
Purpose of DAM is to improve security, efficiency, and accessibility of digital assets.
* Web content management systems (WCM)
WCM is a process and application for creating, storing, and deploying content web on web pages.
* Component content management systems (CCMS)
CCMS Contents are broken in different discrete components such as heading, paragraph, images, table and other elements just help user to manage and organized structured content components.
* Enterprise content management systems (ECM)
It provides a centralized platform to manage content across the entire organization. It offers user to create, collaborate, and share documents security.
* Document management system(DMS)
It is a platform design to manage, store, organize and track digital files and documents within an organization.
Features of content management system (CMS)
1. Easy to create and edit the content .
2. Facilitates collaboration among multiple users to work together.
3. User can control the design and layout.
4. It simplify the process of updating and maintaining websites.
5. It has SEO friendly features.
6. Websites build with CMS are typically designed to adapt different screen sizes and provides consistent user experience with device.
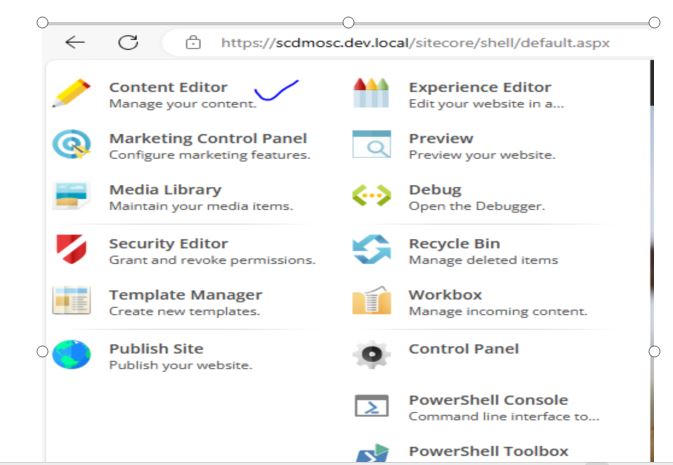
What is Sitecore Content editor & Experience Editor?
Sitecore content editor in Sitecore is an editing tool that are used by author to manage and edit all the content on your website. We can say that It is an application that is design for more experienced author who is familiar with Sitecore and it’s functionality. Sitecore content editor has three main areas like content tree, ribbon and content area.
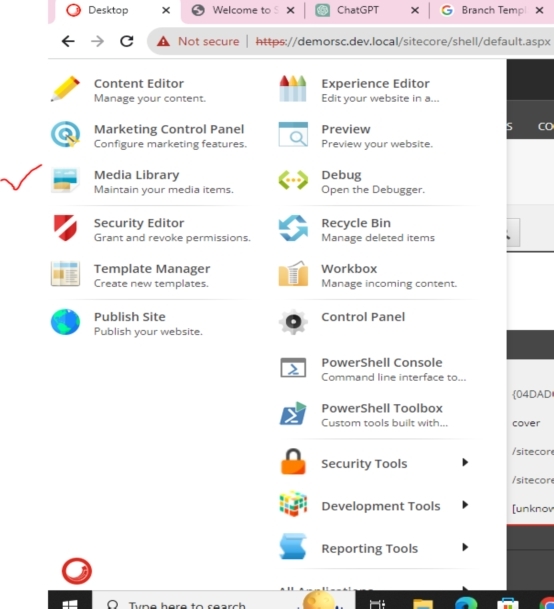
You can find this feature in Sitecore easily. Simply go to start button of Sitecore. As it opens you can see the content editor.
Sitecore content tree
Sitecore content tree is the place where an Item is represented which are created during installation.
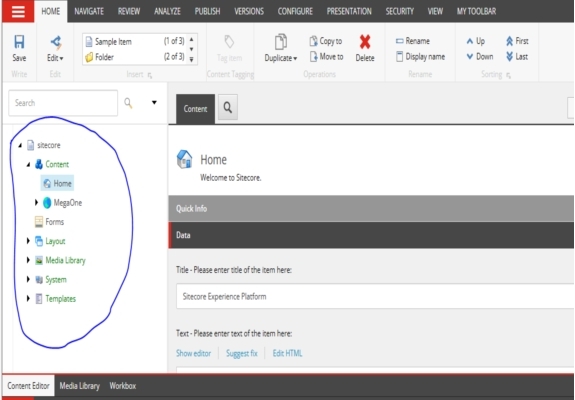
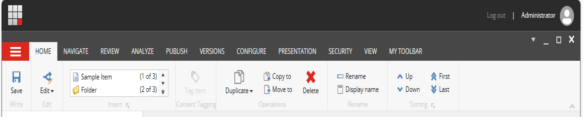
Sitecore Ribbon
This is the top layer menu in Sitecore dashboard. There is different menu which are used for content management. As per your access right you will be able to see more menu in the ribbon section. You can hide the entire ribbon, or you can create your own one.
Sitecore content area
Sitecore content area is the part of Sitecore where we can edit any Item. Whenever we click on any Item in the Sitecore content tree then two tabs appeared in content area.
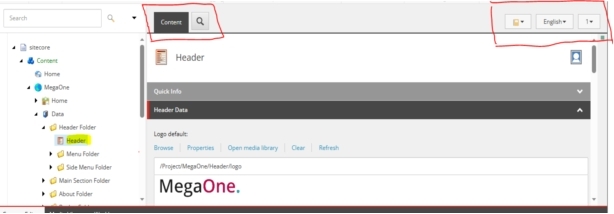
In the above screen shot we can see the two tabs like content and search. There is some additional functionality in top right corner.
In content tab user can edit any Item value that is selected. Other is search where one can search through the selected Item.
* navigate :- It navigate to the specific section or field in the list of field values.
* Language:- toggle between the language versions of the item or to create a new language version.
* Version: – toggle between versions of the item or to create a new version.
Sitecore Experience Editor
Sitecore experience editor is the WYSIWYG. It means what you see is what you get. This editor allows you to changes anything in any Item directly on the page. You can edit all the Items that are visible on the web page like text, image, logos, link and graphics and so on.
You can find easily this tool in the Sitecore. Click on Sitecore start button then select experience editor. Whenever you access the experience editor then Sitecore launchpad takes you to client facing view of web page. Sitecore experience editor gives you a place to personalize individual components.
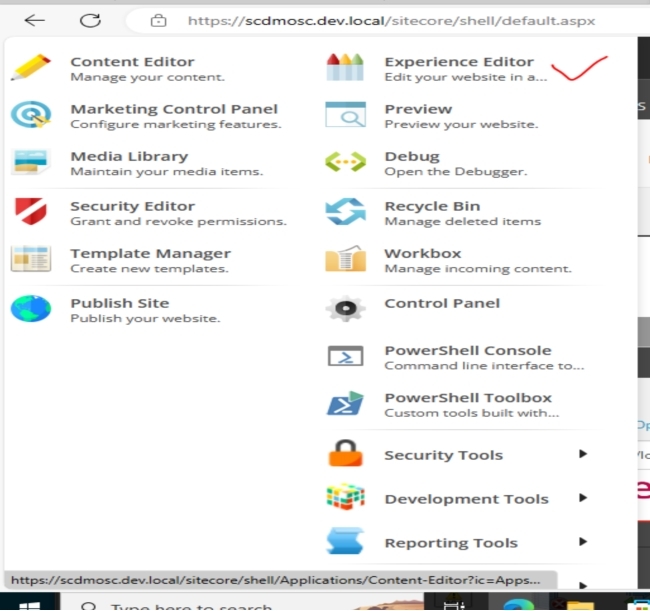
or simply select publish menu from the ribbon and then choose experience editor.
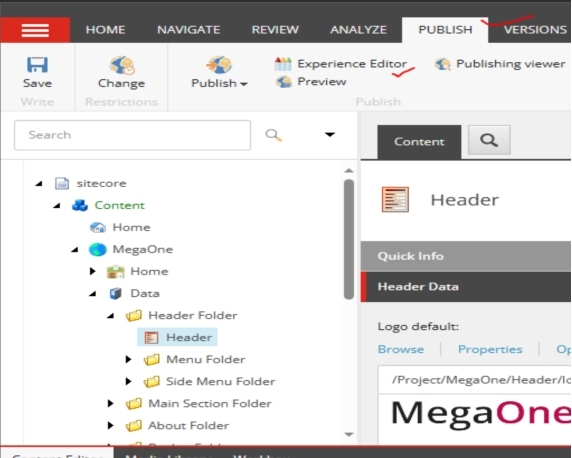
The ribbon section is similar to the content editor. If you have more configuration access right, then you are able to see more tool option in the ribbon section. There is a save button in top left corner. When you edit an item, you can click Hide Ribbon to hide the ribbon temporarily and give yourself more space to work with. Click Show Ribbon to display the ribbon.
What is Sitecore Media library
In Sitecore content tree you can see the Media library. All the media Item is stored inside the Media Library. Media Item may have files like audio, video, document and image file. The best way to store all these media Item is to create a folder structure just like the content tree. You can find this media library by various way. You can search media item by Sitecore media search functionality.
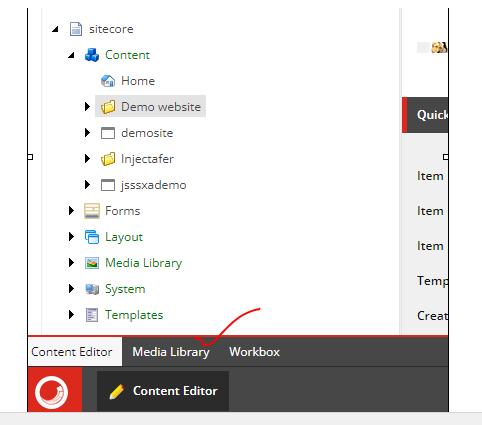
- Go to content editor then /Sitecore/Content/Media Library
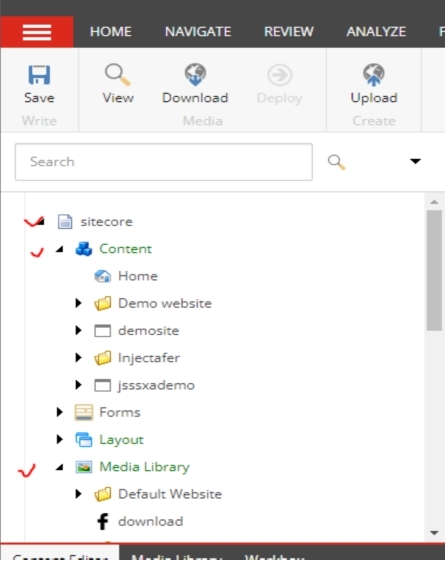
2. Open Sitecore. Here you can see the media library in the bottom layer.
3. Open Sitecore and go to the Sitecore start button (Sitecore logo). Here you will see the media library.
Media library has many functions. Here we can do everything that is related to media. We can attach or detach the image, archive the media item, and auditing the media library.
HOW TO UPLOAD MEDIA FILES IN MEDIA LIBRARY
There are three options by which you can upload media files into the media library.
* Upload files
* Upload files(advanced)
* Drop & drag
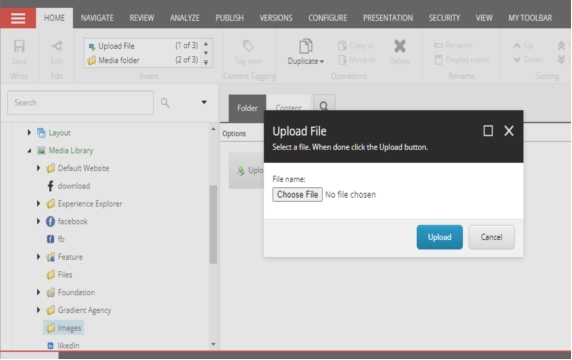
1. Upload files
This option gives you to upload single file having the same location. You can upload files one by one here.
2. Upload files(advanced)
This option gives you to upload multi files at a time. Just click on upload files(advanced) option and choose file that want to be upload. You can upload a bunch of files with options to override or upload a zip file and extract into Sitecore.
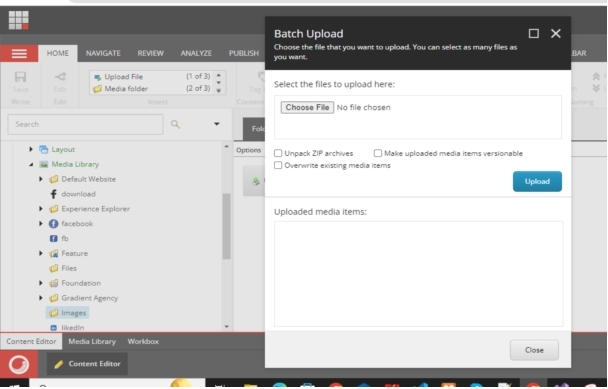
In above screen shot we can see the three check box options.
- Unpack zip archive.
It means you can zip the folder first then you can browse that folder by chosen file option. Many zip folders can be browse here together. This option gives additional features to re-create the folder structure in media library.
2. Make uploaded media Item version able
We can make any files version able by this option. This option creates files in selected language only. Here you can create the language version manually.
3. Override existing media Item
This option enables you to override the files by the same name which is already exist in the media library with the same name. Here media library makes a copy of files if you don’t override any files by the same name.
Drop & drag.
We can upload a single or multiple file here by drop and drag option. This option is better comfortable with Internet explorer 7 or later to upload files. This option is very useful when you want to upload many files in different location.
What is Sitecore Rendering & Layout?
Sitecore Rendering
Rendering is a process that are used to render a page or a part of page in Sitecore. There are many renderings in Sitecore like Controller rendering, View rendering, Item rendering, Method rendering, URL rendering, Xsl rendering etc. Let’s discuss about controller rendering and view rendering.
Controller rendering
Sitecore controller rendering is little complex as compared to view rendering at that times when it requires controller action. The rendering definition item includes both a controller name and controller action to execute. The controller action is then responsible for returning the correct view.
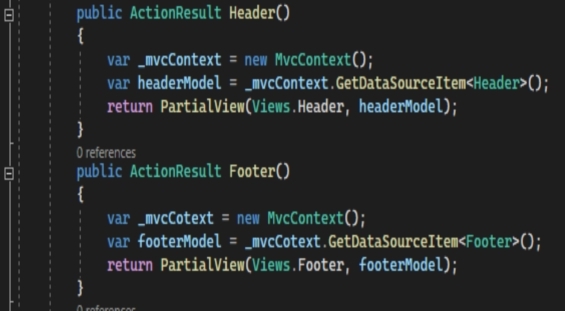
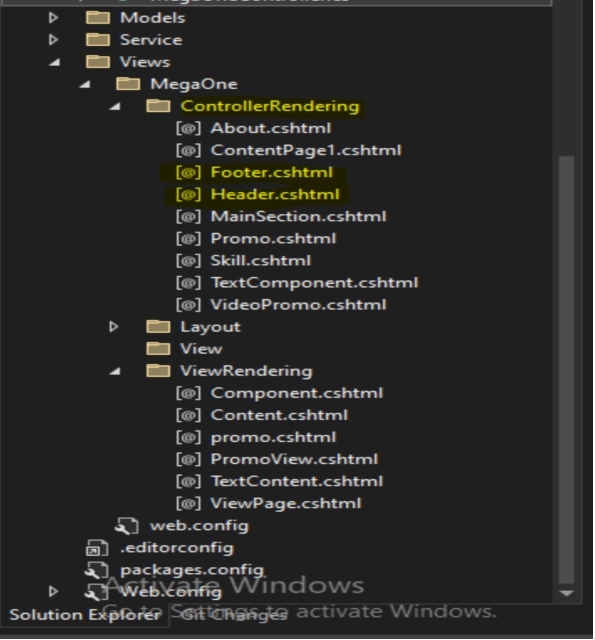
In above screen shot there are two control action methods, say Header() and Footer().
A controller rendering will be well familiar with the developers that comes from the .NET framework background. When we define a controller rendering in Sitecore, then getting instead of view, we point Sitecore to action method. When controller rendering is added inside the place holder to view then controller name and controller action is executed first in Sitecore.
How to add controller rendering
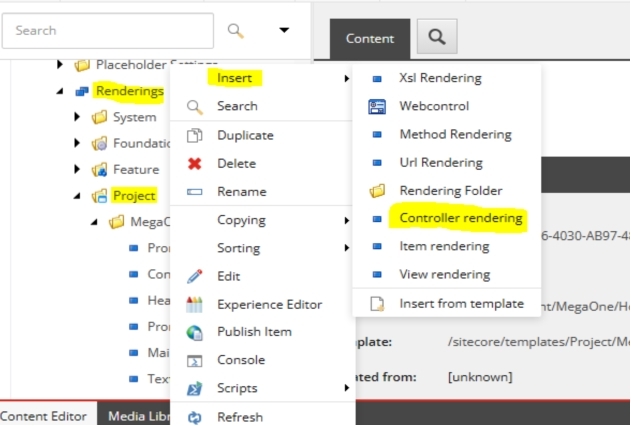
- Go to the Layout section in Sitecore content tree.
2. Choose Rendering and select project then choose your project name (in my case it is Mega One).
3. Right click on your project. You will see insert option. Expand insert option and select Controller rendering.
Controller rendering should be used when we need the business logic in our controller.
View Rendering
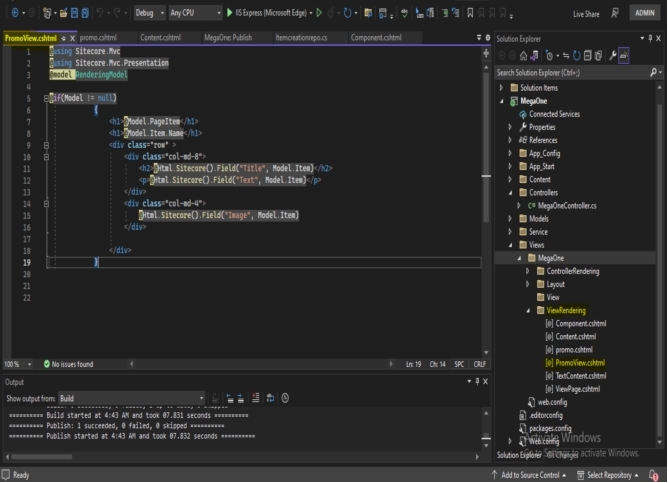
View rendering is great and simple as compared to controller rendering. Controller Renderings allow business or other complex logic to execute before returning a view. In fact, it is possible to branch and return different views – for example, you may want to use one view for rendering content and one view for displaying Experience Editor fields. View rendering consist the rendering definition item that points to razor view file (.cshtml). A view rendering is an MVC view. It is built from a single cshtml file.
Steps to create view Rendering
- Right-click the Views folder in the Solution Explorer in Visual Studio, and select Add, New Item and add a razor file.
- Select Sitecore View Rendering in the Sitecore/MVC group.
- Sitecore Rocks will ask where to create the corresponding Sitecore definition item. Put the item in the Renderings folder in the master database.
- Customize the model by changing the mvc.GetModel pipeline if required.
- Use this when you want to render item content that does not require any significant business or presentation logic.
Sitecore Layout
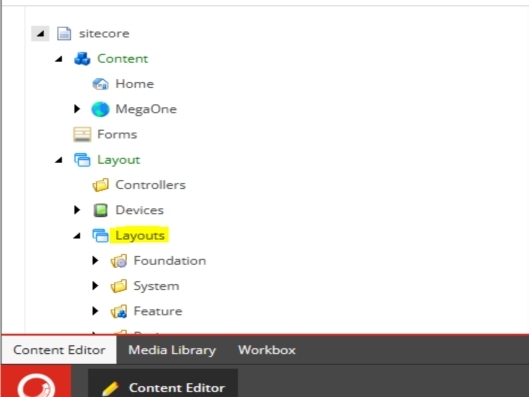
Sitecore Layout is the term that are used to describe the presentation details of an Item. It is a HTML structure for a page. In simple word it is a scaffolding for a web page. Sitecore layout have multiple placeholders in which one can plug any component rendering. You can find Layout easily in the Sitecore content tree. See below screenshot.
Layout is comparable to master page in web forms. Sitecore Layout provides the complete HTML structure for page. It always includes <body> and <head> tag for the markup.
What is Sitecore Item & Relationship
Whenever we open Sitecore and see the content tree then every entity that is visible here is called Item. Item located in the top of content tree is called root Item. All Items may have sub-Items. Each Item and sub-Item has parent/child relationship. Remember that every child Item has only one parent Item but there can be many child Items for a parent Item. Each Item represent the different thing. Some Items represent content, some represent image, some represent template, some represent settings and so on. An Item can represent any kind of information that make up web page. An Item always has a unique Id and name, and both these are based on templates that defines which field the Item contain.
Lock a parent child Relationship
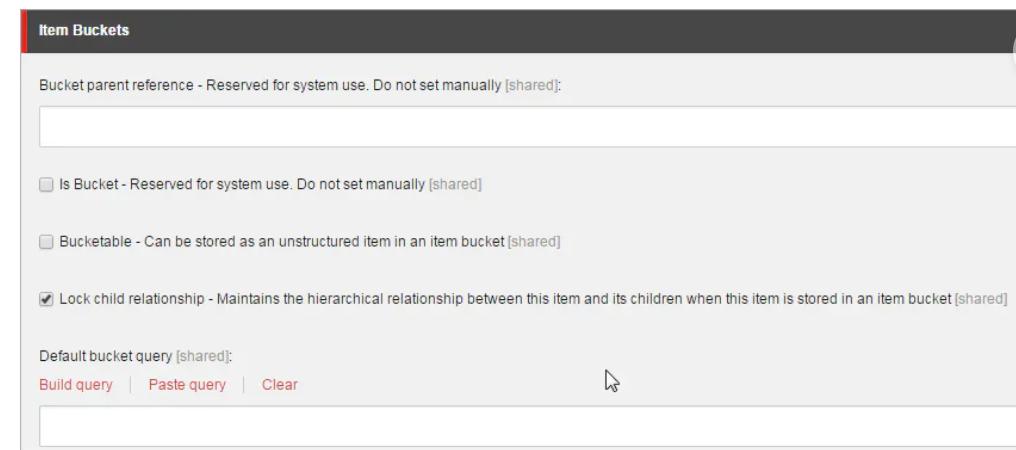
In many cases if we want to lock the parent child relationship even both are stored in the Item bucket. In this case we must ensure that child items are stored inside the parent item. To lock parent to child item, do the following steps.
- Go to the template manager and select your parent template.
2. Go to ribbon section and tab on View. Select standard field check box to see the different fields inside this template.
3. Expand your parent template in content tree and select its standard values item.
4. Go to the right pane and scroll down to the item bucket section. Here checks the Lock child relationship box. This will lock the parent/child relationship of an Item.
What is Sitecore Template & its Type?
Sitecore template is the backbone of Sitecore. Everything we see in Sitecore is an Item. Template is one of the Item. This template defines the structure and behavior of another item. Template also defines the section and fields. Each section is sub item for the template and each field are the sub items for section. There are mainly three types of templates like Data template, Branch template and Command template.
Data template
Data template is the data type that defines the structure and behaviour of all items associate with that data template. A data template contains the sections where there can be many fields inside this section. Data template sections organizes data template fields visually in editing user interface.
How to create data template
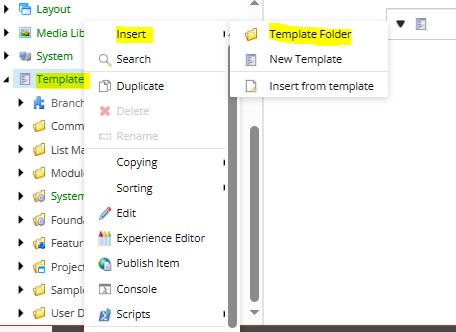
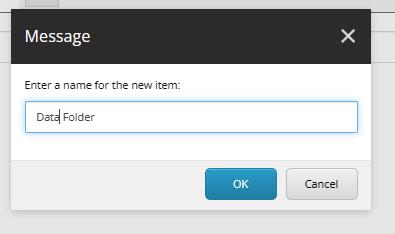
- Go to content tree and select template Item. Right click on this template and insert a template folder then name as you want (in my case it is Data Folder).
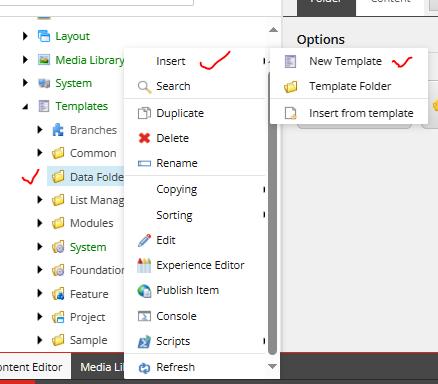
2. Now right click in Data Folder and choose insert option then create a new template and name it as you want (in my case it is promo). Also choose its base template here. See below screen shot.
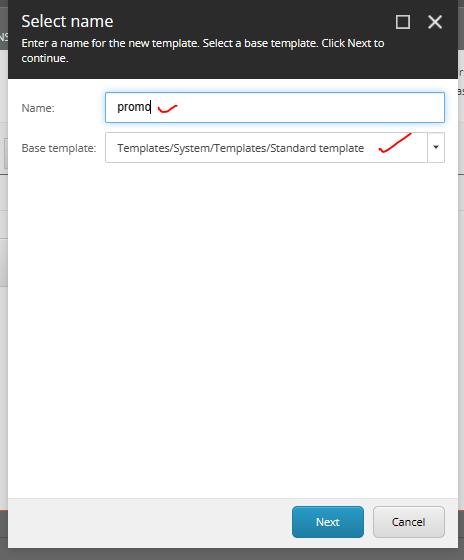
3. Click Next button.
4. On the location page, select the project specified folder just to contain the new data template and then click next.
5. Click on Finish.
Branch template
Branch template is also called Branch template definition Item. This template enables user to create multiple Items using a reusable, predefined structure. When user choose branch template from the insert option then Sitecore duplicates item beneath the branch template definition item, including field values, and then performs token substitution on item names and field values.
How to create branch template
- Go to content editor and select template Item. Expand this template Item and select Branch. Right click on this branch template item and choose insert option and select branch folder to create any required project specific folders.
2. Go to content tree, click the relevant project specific folder and insert a new branch template definition item using the /system/branches/branch data template.
3. Select newly created branch template definition item. Right click on it and select insert option for one or more items.
Command Template
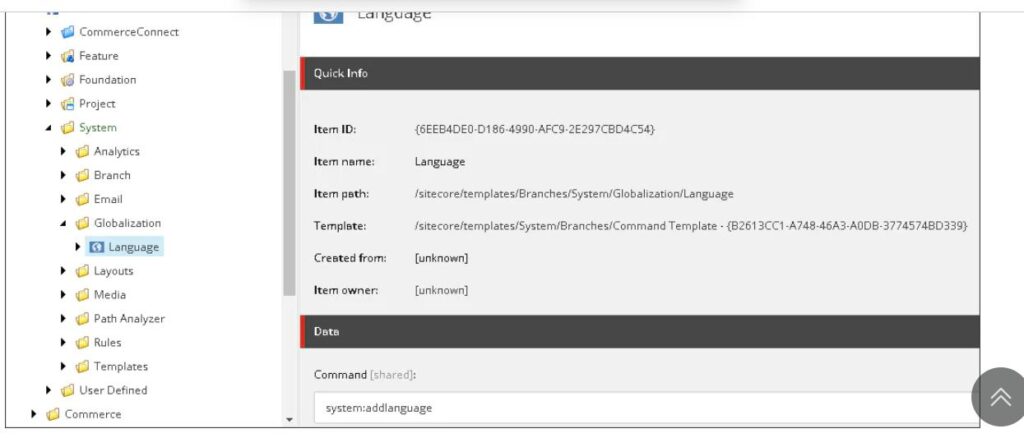
Command template is also known as the command template definition item. This template defines a class and a method to be called during an insert option. The command template insert option appears identical to data template and branch template insert option. Command template doesn’t hold content themselves but can be linked to Items. When you take an action in Sitecore, it’s the command template that does the magic behind the scenes. This template allows you to insert Item using logic rather than a predefined structure. You can find this template in Sitecore content tree easily. Go to /Sitecore/Content/Template/System/Language
What is Sitecore presentation concept?
The presentation concept in sitecore describes how sitecore presents data, based on the requesting agent(web browser, RSS reader etc). Sitecore presentation includes Layout, Component, rendering, Placeholder etc.
Layout
Layouts in Sitecore MVC serve the same purpose as an aspx page in standard Sitecore i.e., to define the outer most html markup of the pages in your site. In MVC they reference a cshtml file instead of an aspx. One thing you will notice in a layout definition item is a new field called “Model” which allows you to link to a Rendering Model.
View Rendering
View renderings in Sitecore MVC are roughly equivalent to Sub layouts in standard Sitecore ASP.NET, or XSLT renderings. The benefit of view renderings over sub layouts is that you have the ability to use the data source out of the box without writing a single line of C# code. Compared to XSLT renderings, view renderings give you easy to use razor syntax instead of ugly XSL transforms. They are a good choice when you just want to display content from one item (or one item plus its children) – an example would be a spot or hero component. View renderings can be configured to reference a rendering model which is a type of view model which is initialized by the Sitecore MVC controller and passed automatically to your view rendering. This is useful if you need to reference several different items for your view rendering.
Controller Rendering
Controller renderings in Sitecore MVC allow you to map a rendering to a controller action. When you create a controller rendering in Sitecore, you specify the controller and action names which refer to your controller class name and the action (method name). Note that if you are referencing the ‘Index’ action of your controller, you may omit the “Controller Action” field. Controller renderings are useful when you want to perform business logic on your data, display data from an external source or multiple sources. As with view renderings, you can use the data source item set for a controller rendering within your controller code. This means you could implement all the renderings in your solution as Controller renderings. One advantage of controller renderings overview renderings is the ability to write unit tests against your controller methods.
Item Rendering
Item renderings in Sitecore MVC allow you to associate a rendering with a content item. You can then render this item using its assigned rendering within a page by referencing just the item. An item rendering does not reference a cshtml file or a controller. Think of them more as a sort of placeholder benefit of using an item rendering is that you just select a data source item then Sitecore renders it with its corresponding rendering. This means you could swap out different types of components with a single step, instead of removing a rendering from a page, then adding a new one and setting its data source.
Component
Whatever we see in a web page we can consider all those as a component. In top of page, it can be a header component, lower bottom of a page may footer component, Images in page may image component and so on. A component defines a part of page. It can contain layout information, for example, content fields and placeholders, and their positions on the page, as well as business logic or metadata for the page. Typically, you reuse components on multiple pages. If the component displays content, you can save the content on the page item or in a separate content item. You assign a content item to the component on the page, and you can reuse the content item on other pages. When we add a component to the page, the component presents data that is save locally on the page. If we modify any content, then modification is saved on the page.
Placeholder
Placeholder in Sitecore is place where you can add your component. There can be multiple placeholders in your page. When you add a component to the page, you tell Sitecore put it in placeholder(something). When you log into Sitecore and look into page, under the Presentation tab, there is an icon called details. Click on this detail’s icon. A pop up will open and here you will be able to select a component or add a new component to the Default Layout. A placeholder is a Sitecore component used within a layout, view, or sub layout, which allows the dynamic placement of components in it. It does not have any user interface, the same as the ASP.NET placeholder control. In Sitecore MVC, a placeholder can be created using the @Html. Sitecore ().
HOW TO CREATE PLACEHOLDER IN SITECORE
In the Sitecore content tree, under /Sitecore/layout/Placeholder Settings/Project/<your-app-name>/<placeholder-name>, create placeholder settings. Add your placeholder to the Layout Service Placeholders field in your rendering item.
Setup Sitecore Project in Sitecore
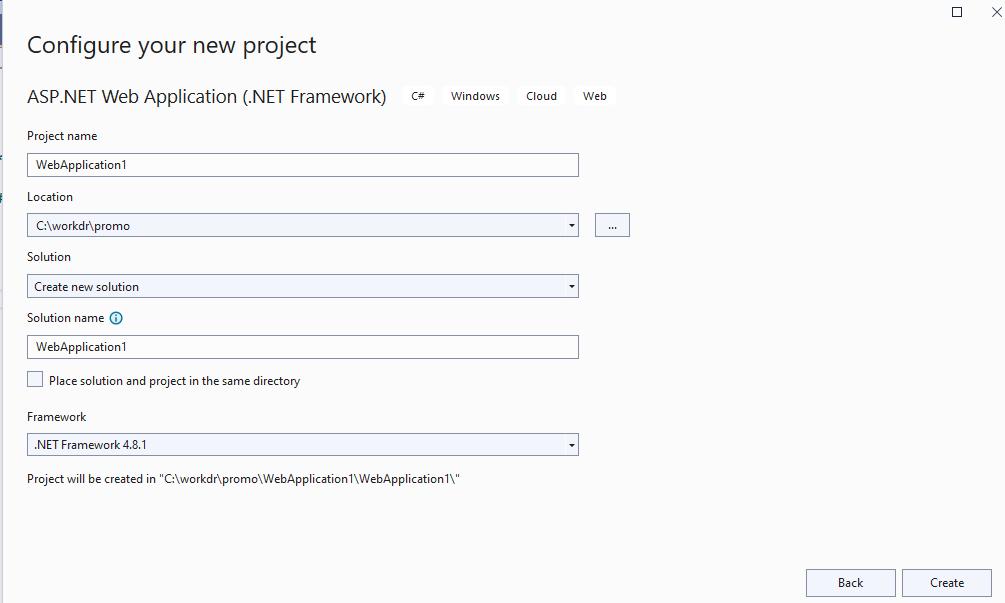
Step1
Open visual studio. Go to the file>new>project. Select template > visual c# > web >ASP.NET > web application project. Name your project as per your need. Select location where your project is to be stored. Choose latest framework. In my case I have selected .NET Framework 4.8.1 and hit create button.
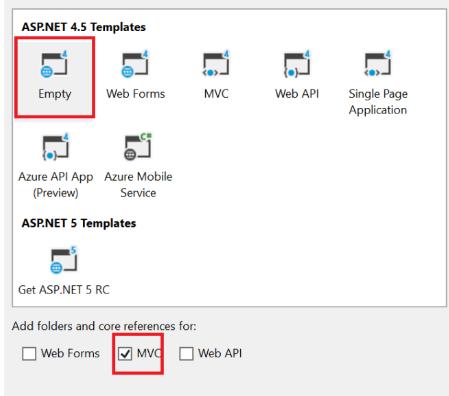
STEP2
Select your template. We have here selected Empty template. Don’t forget to check the MVC box.
STEP3
Once We have created new project, it will also install some standard configuration files which will be overwrite, for now please exclude the following files from the project and also delete their physical version.
* Global.asax
* Global.asax.cs
* web.config
* web.config.debug
* web.config.Release
Step4
Navigate to the install directory that was created automatically by the Sitecore installer.
* Default.aspx
* Default.css
* Default.js
* Global.asax
* Web.Config
* Webedit.css
Include all these files through visual studio project ‘include file’ options.
Step5
Navigate to the bin folder. Copy the following files here in this folder. All these files are called reference.
* Sitecore.kernel
* Sitecore.Client
* Sitecore.logging
* Sitecore.Mvc
* Sitecore.NVelocity
* Sitecore.Updated
* Sitecore.Zip
* Sitecore. Analytics
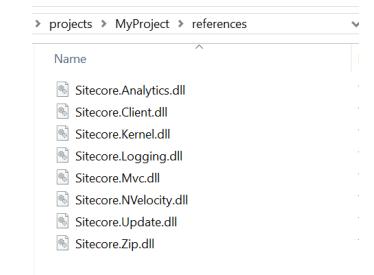
Reference this file via visual project ‘s adds reference option.
Step6
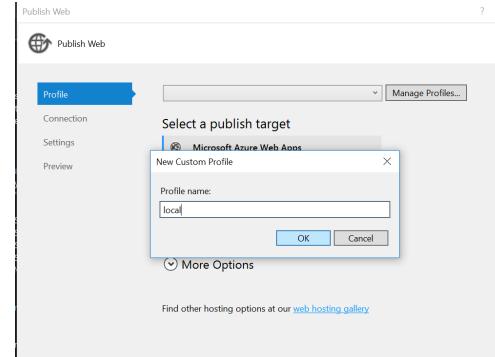
Next step is to publish the profile of project. Create new custom publish from the ribbon Option. In my case profile name is local.
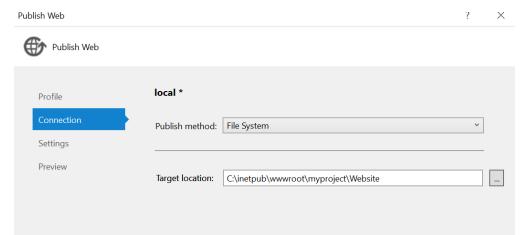
Here select ‘file system’ in publish method. Give your project path in the Target location. See below screenshot.
Next choose ‘Debug’ option from the configuration drop down. This should be only chosen for local deployments. For QA and other environments, you must choose ‘Release’.

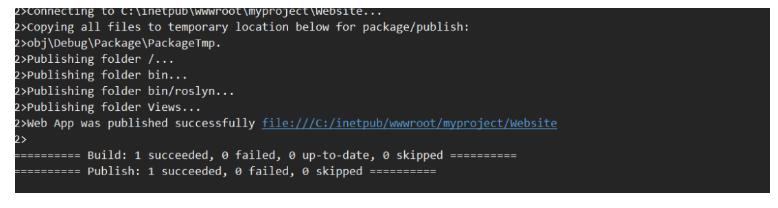
Before publishing you must preview the files. And after publishing your files be looks like the below screen shot.
Step7
XML Config transform
We need to create environment specific config files which can be transform to correct config setting during the automation deployment. For this purpose, install VS Slow Cheetah extensions and then you right click to add any new configuration files.
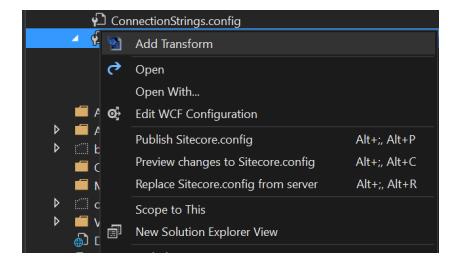
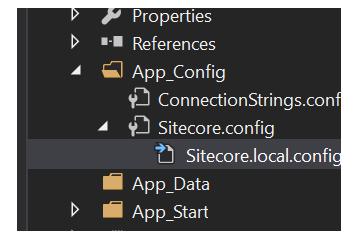
Once you click ‘Add Transform’ new config file (Sitecore.local.config) will be added in the project. This is where environment specific settings can be updated and upon publish they will be transformed. This alone will save you a lot of time of managing different config settings for different environments.
A sample XML transform file for replacing the data Folder location could be:-
